
Tightening scope rings without a torque wrench may seem daunting, especially for those new to mounting optics on their firearms. However, with the right knowledge and techniques, it is entirely possible to securely mount your scope without the specialized tool. This guide will delve deep into the process, covering all the related subtopics to ensure you achieve a stable, accurate, and reliable setup.
Understanding the Basics of Scope Mounting
Before diving into the specifics of tightening scope rings, it’s essential to understand the basics of scope mounting. This includes knowing the different components involved and their functions.
Components of Scope Mounting
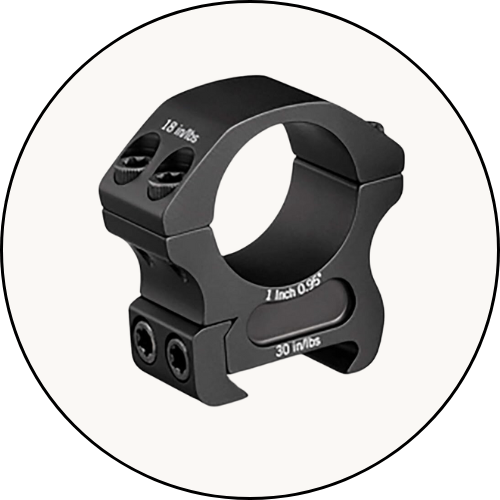
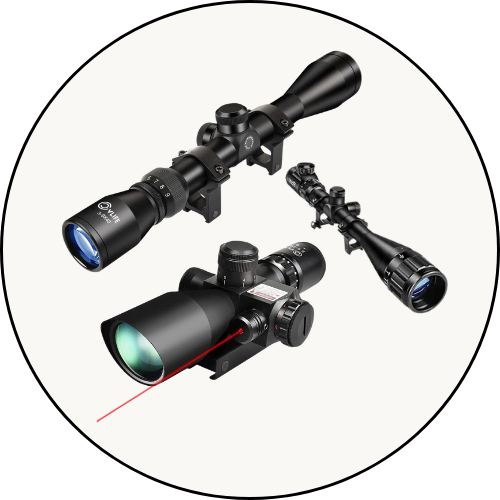
- Scope Rings: These are the circular clamps that hold the scope in place on the firearm. They come in various sizes and designs to fit different scopes and mounting systems.
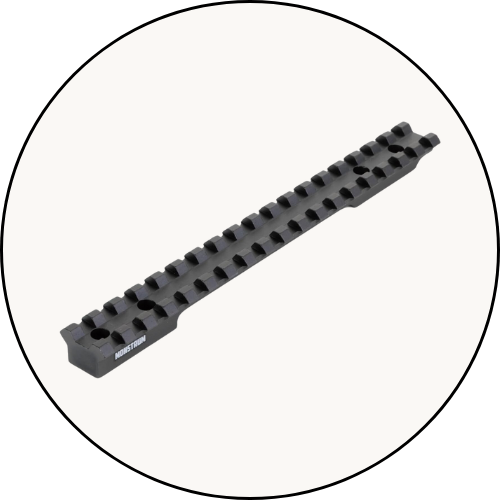
- Base or Rail: The base or rail is the part of the firearm where the scope rings are attached. Common types include Weaver, Picatinny, and dovetail rails.
- Scope: The optical device used for aiming and shooting more accurately over long distances.
- Screws: These secure the scope rings to the base and keep the scope firmly in place.
Importance of Proper Scope Mounting
Proper scope mounting is crucial for several reasons:
- Accuracy: A well-mounted scope ensures that the rifle’s point of aim and point of impact are consistent.
- Durability: Securely mounted optics are less likely to shift or become damaged from recoil.
- Comfort: A correctly positioned scope allows for a proper cheek weld and eye relief, enhancing shooting comfort and performance.
Selecting the Right Tools
Even without a torque wrench, having the right tools is essential for tightening scope rings effectively.
Essential Tools
- Hex Keys/Allen Wrenches: These are used to tighten the screws on the scope rings. Ensure you have the correct sizes for your particular rings.
- Screwdrivers: Flathead or Phillips screwdrivers may be necessary depending on the type of screws used.
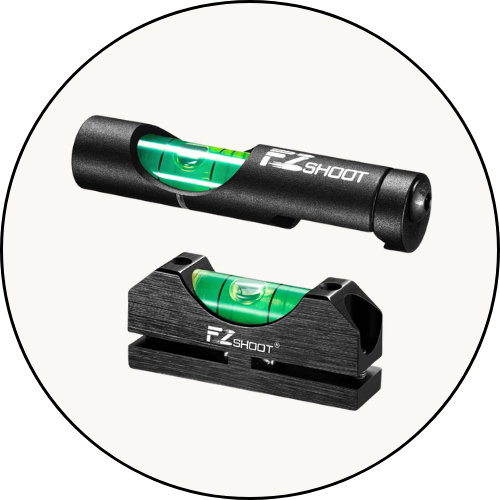
- Bubble Level: To ensure the scope is mounted level, which is critical for long-range accuracy.
- Gun Vise or Rest: To keep the firearm stable during the mounting process.
Preparing the Firearm and Scope
Proper preparation can make the mounting process smoother and more effective.
Cleaning
- Clean the Base and Rings: Use a cloth and some mild solvent to remove any dirt, oil, or debris from the mounting base and inside the rings.
- Clean the Scope: Wipe down the scope to ensure there’s no dirt or oil that could affect the mounting process.
Inspecting the Components
- Check for Damage: Inspect the rings, base, and scope for any signs of damage or wear that could compromise the mounting.
- Fit Check: Ensure that the scope rings fit the scope tube and base properly.
Mounting the Base
If your firearm doesn’t already have a base installed, you’ll need to mount one.
Attaching the Base
- Position the Base: Align the base with the mounting holes on the firearm’s receiver.
- Insert Screws: Start threading the screws into the holes by hand to ensure they are correctly aligned.
- Tighten Screws: Use the appropriate tool to tighten the screws evenly. Without a torque wrench, tighten them snugly but be careful not to over-tighten and strip the screws.
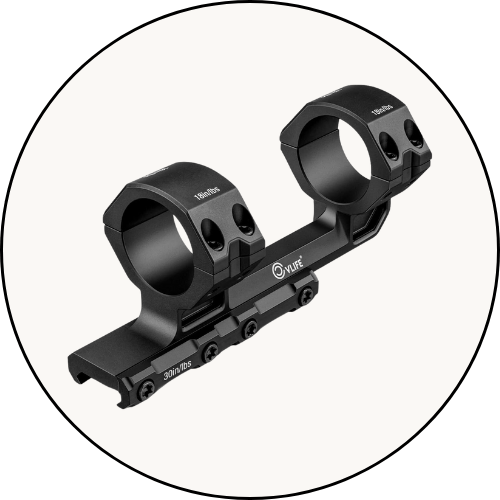
Installing the Scope Rings
With the base securely mounted, it’s time to install the scope rings.
Positioning the Rings
- Place the Bottom Halves: Place the bottom halves of the rings on the base, ensuring they are aligned with the slots.
- Secure the Bottom Halves: Insert and tighten the screws to hold the bottom halves in place. Again, tighten them snugly without over-tightening.
Mounting the Scope
Now that the rings are in place, you can mount the scope.
Placing the Scope
- Position the Scope: Lay the scope into the bottom halves of the rings, ensuring it is roughly centered.
- Adjust for Eye Relief: Move the scope forward or backward to achieve proper eye relief. This is the distance from your eye to the scope where you get a full, clear view through the scope.
Leveling the Scope
- Use the Bubble Level: Place a bubble level on the top of the scope to ensure it is perfectly level.
- Adjust as Necessary: Slightly rotate the scope until the bubble level shows it is level.
Securing the Top Halves of the Rings
With the scope positioned and leveled, you can secure the top halves of the rings.
Tightening the Screws
- Start Hand Tightening: Place the top halves of the rings over the scope and start threading the screws by hand.
- Alternating Pattern: Tighten the screws in an alternating pattern (e.g., top-left, bottom-right, top-right, bottom-left) to ensure even pressure.
- Final Tightening: Without a torque wrench, tighten the screws until they are snug. Use a consistent, firm pressure to avoid over-tightening.
Testing and Adjusting
Once the scope is mounted, it’s essential to test and make any necessary adjustments.
Checking Alignment
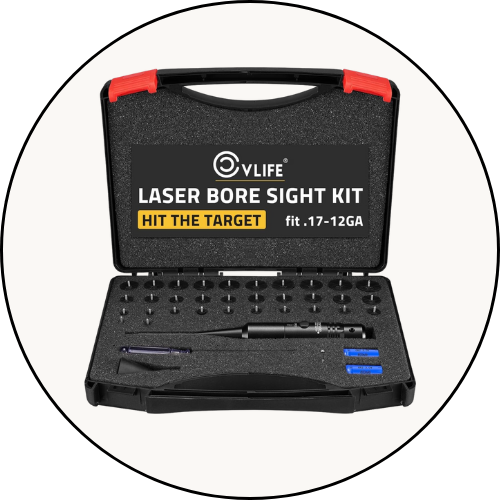
- Bore Sight the Rifle: Use a bore sighter to ensure the scope is roughly aligned with the rifle’s bore.
- Test at the Range: Fire a few test shots at the range to check the scope’s alignment and make any necessary adjustments.
Rechecking Tightness
- Inspect Screws: After initial testing, inspect all screws to ensure they are still tight.
- Regular Maintenance: Periodically check the tightness of the screws during regular use, especially after firing a significant number of rounds.
Troubleshooting Common Issues
Even with careful mounting, issues can arise. Here’s how to troubleshoot common problems.
Scope Shifting
- Check Screws: Ensure all screws are tight and not stripped.
- Inspect Rings and Base: Make sure there are no defects or damage causing the scope to shift.
Inconsistent Accuracy
- Re-level the Scope: Make sure the scope is still level.
- Check Eye Relief: Ensure the scope is positioned correctly for your eye relief.
Difficulty Adjusting the Scope
- Recheck Alignment: Ensure the scope is aligned with the bore.
- Inspect for Obstructions: Check for any dirt or debris that could be affecting the scope’s adjustments.
Advanced Techniques
For those looking to go beyond the basics, here are some advanced techniques for tightening scope rings without a torque wrench.
Using Thread Locker
- Apply Sparingly: Use a small amount of thread locker on the screws to help keep them secure.
- Avoid Excess: Too much thread locker can make it difficult to remove the screws later.
Lapping the Rings
- Why Lapping?: Lapping the rings can help ensure a better fit and more even pressure on the scope tube.
- How to Lap: Use a lapping tool and compound to smooth and align the inside surfaces of the rings.
Using a Torque Driver
- Alternative to a Torque Wrench: A torque driver can provide more precise control over the tightening process.
- Setting the Torque: Follow the manufacturer’s recommendations for the appropriate torque settings.
Conclusion
Tightening scope rings without a torque wrench is entirely feasible with the right approach and attention to detail. By following these steps and using the appropriate tools, you can achieve a secure and reliable scope mounting. Remember to periodically check and maintain your setup to ensure ongoing accuracy and performance.
Selecting the Right Scope Rings
Choosing the right scope rings is critical for ensuring a secure and accurate setup. The wrong rings can lead to issues such as scope movement, misalignment, or even damage to your scope or firearm.
Types of Scope Rings
- Fixed Rings: These are the most basic type and provide a simple, sturdy mounting solution. They don’t offer much flexibility once mounted.
- Detachable Rings: These allow for easy removal and reattachment of the scope, which is useful for transporting the rifle or switching between optics.
- Quick-Release Rings: Designed for rapid detachment and attachment, these are ideal for situations where you need to swap optics quickly.
- Integral Rings: These rings are built into the base, providing a very solid and stable mount but less flexibility in terms of adjustments.
Ring Height
The height of the scope rings is another important factor. Rings come in low, medium, and high profiles, and the correct height depends on several factors:
- Objective Lens Diameter: The larger the objective lens, the higher the rings need to be to clear the barrel.
- Mounting Base Height: If the base is high, you may need lower rings.
- Shooter’s Comfort: The height should allow for a comfortable cheek weld on the stock.
Ensuring Compatibility
To avoid compatibility issues, make sure your scope rings match the diameter of your scope tube (common sizes are 1 inch and 30 mm) and fit the mounting base on your firearm.
Checking Fit and Finish
- Alignment: Ensure the rings align properly with the base and each other.
- Finish Quality: Look for any rough spots or imperfections that could damage the scope or interfere with mounting.
Preparing the Scope Rings
Even new scope rings may require some preparation to ensure the best fit and performance.
Deburring
- Remove Burrs: Use a small file or sandpaper to remove any burrs or rough edges inside the rings that could scratch the scope tube.
- Smooth Surfaces: Ensure the inside surfaces of the rings are smooth and free of any debris.
Lapping Scope Rings
Lapping is the process of smoothing and aligning the inside surfaces of the rings to improve contact with the scope tube.
- Why Lapping is Important: Lapping can reduce stress on the scope tube, improve alignment, and increase the surface area in contact with the scope, leading to a more secure mount.
- Lapping Kit: Use a lapping kit, which typically includes a lapping bar and compound. Follow the instructions carefully to lap the rings properly.
Mounting the Scope
Properly mounting the scope is a multi-step process that requires attention to detail to ensure everything is aligned and secure.
Initial Setup
- Secure the Firearm: Place the firearm in a gun vise or rest to keep it stable during the mounting process.
- Attach the Bottom Halves: Position the bottom halves of the rings on the base, ensuring they are aligned with the mounting slots.
Positioning the Scope
- Place the Scope: Lay the scope into the bottom halves of the rings.
- Adjust Eye Relief: Move the scope forward or backward until you achieve the proper eye relief. This distance is critical for obtaining a full, clear sight picture and avoiding scope bite (recoil hitting your eye).
Leveling the Scope
A level scope is crucial for accuracy, especially for long-range shooting.
- Using a Bubble Level: Place a bubble level on the top turret of the scope.
- Adjusting the Scope: Rotate the scope until the bubble level indicates it is perfectly level. This may take some fine-tuning.
Securing the Scope
Once the scope is positioned and leveled, it’s time to secure it with the top halves of the rings.
Tightening the Screws
- Start Hand Tightening: Begin by threading the screws into the top halves of the rings by hand to avoid cross-threading.
- Alternating Pattern: Tighten the screws in a cross pattern (e.g., top-left, bottom-right, top-right, bottom-left) to ensure even pressure on the scope tube.
- Consistent Pressure: Apply firm, consistent pressure to tighten the screws snugly. Without a torque wrench, aim for a consistent feel rather than a specific torque value.
Testing the Setup
After securing the scope, it’s essential to test the setup to ensure everything is properly aligned and secure.
Bore Sighting
- Initial Alignment: Use a bore sighter to roughly align the scope with the rifle’s bore. This will save time and ammunition at the range.
- Making Adjustments: Adjust the windage and elevation turrets on the scope to align the reticle with the bore sighter.
Range Testing
- Live Fire Testing: Head to the range and fire a few test shots to verify the scope’s alignment and make any necessary adjustments.
- Rechecking Screws: After firing, check all the screws to ensure they remain tight and secure.
Maintenance and Long-Term Care
Proper maintenance is key to ensuring your scope stays securely mounted and performs well over time.
Regular Checks
- Periodic Inspections: Regularly inspect the screws and mounting components to ensure they remain tight.
- Cleaning: Keep the scope and mounting components clean and free of debris.
Reapplying Thread Locker
If you used thread locker during the initial mounting, it may need to be reapplied periodically to maintain its effectiveness.
- Removing Screws: Carefully remove the screws and clean off the old thread locker.
- Reapplying: Apply a small amount of thread locker and re-tighten the screws.
Common Issues and Troubleshooting
Even with careful mounting, issues can arise. Here’s how to troubleshoot and resolve common problems.
Scope Movement
- Check Screw Tightness: Ensure all screws are tight and not stripped.
- Inspect Rings and Base: Look for defects or damage that could cause the scope to move.
Inconsistent Accuracy
- Re-level the Scope: Verify that the scope is still level.
- Check for Loose Components: Ensure that all mounting components are securely fastened.
Difficulty Adjusting the Scope
- Recheck Alignment: Ensure the scope is properly aligned with the bore.
- Inspect for Obstructions: Look for any dirt or debris that could be affecting the scope’s adjustments.
Advanced Techniques and Tips
For those looking to refine their skills, here are some advanced techniques and tips for tightening scope rings without a torque wrench.
Using a Torque Driver
- Precision Tool: A torque driver can provide more precise control over the tightening process.
- Setting the Torque: Follow the manufacturer’s recommendations for the appropriate torque settings.
Scope Ring Bedding
Bedding the scope rings involves creating a custom-fit interface between the rings and the scope to enhance stability.
- Bedding Compound: Use a bedding compound to fill any gaps between the rings and the scope tube.
- Custom Fit: Allow the compound to cure, creating a custom-fit interface that enhances stability and reduces stress on the scope tube.
Thread Locker Application
Using a thread locker can help keep screws secure, but it’s essential to apply it correctly.
- Choosing the Right Thread Locker: Use a medium-strength thread locker that allows for adjustments but keeps screws secure.
- Applying Sparingly: Apply a small amount to the screws to avoid excess that could make adjustments difficult.
Final Thoughts
Mounting a scope without a torque wrench requires careful attention to detail and a methodical approach. By following the steps outlined in this guide and using the right tools, you can achieve a secure and reliable setup that enhances your shooting accuracy and performance. Remember to regularly check and maintain your setup to ensure ongoing reliability and precision.
Understanding Scope Mounting Systems
The method and equipment you use for mounting your scope can vary depending on the type of firearm and the specific scope you are using. Understanding these systems is crucial to achieving a proper mount without a torque wrench.
Picatinny vs. Weaver Rails
- Picatinny Rail: A Picatinny rail has a more standardized spacing between slots, typically 0.206 inches, allowing for greater flexibility in positioning the rings. It’s commonly used in military and tactical applications.
- Weaver Rail: Weaver rails have slots that are not uniformly spaced, and not all Weaver accessories are compatible with Picatinny rails. However, many modern mounts are designed to be compatible with both systems.
Dovetail Mounts
- 11mm Dovetail: Often found on air rifles and .22 caliber rifles, this mounting system requires specific rings that fit into the dovetail grooves.
- 3/8” Dovetail: Similar to the 11mm dovetail but slightly larger, used on some rimfire and air rifles.
Integrated Bases
- Integral Scope Mounts: Some rifles come with integrated bases that eliminate the need for separate mounting systems, providing a more rigid and straightforward mounting process.
Detailed Steps for Mounting the Scope
Positioning and Securing the Base
- Align the Base: Place the base on the receiver, ensuring it aligns perfectly with the mounting holes.
- Thread the Screws by Hand: Start by threading the screws by hand to avoid cross-threading.
- Tighten the Screws: Use a screwdriver or hex key to tighten the screws. Without a torque wrench, apply firm, even pressure until the screws are snug.
Installing the Scope Rings
- Bottom Halves of Rings: Place the bottom halves of the rings on the base, making sure they are evenly spaced.
- Secure the Bottom Halves: Tighten the screws in a crisscross pattern to ensure even pressure.
Mounting and Positioning the Scope
- Set the Scope in Place: Place the scope into the bottom halves of the rings.
- Adjust Eye Relief: Slide the scope forward or backward until you achieve the correct eye relief, ensuring a full sight picture without blackouts.
- Leveling the Scope: Place a bubble level on top of the scope to ensure it is level. Adjust as necessary until the bubble is centered.
Securing the Top Halves of the Rings
- Initial Hand Tightening: Thread the screws into the top halves of the rings by hand.
- Tighten in a Crisscross Pattern: Using your screwdriver or hex key, tighten the screws in a crisscross pattern to apply even pressure.
- Final Tightening: Without a torque wrench, apply firm, even pressure until the screws are snug. Avoid over-tightening to prevent damage to the scope or rings.
Testing and Verifying the Mount
Bore Sighting
- Initial Alignment: Use a bore sighter to roughly align the scope with the rifle’s bore.
- Making Adjustments: Adjust the windage and elevation turrets on the scope to align the reticle with the bore sighter.
Live Fire Testing
- Initial Shots: Fire a few shots at the range to check the scope’s alignment.
- Adjust as Necessary: Make any necessary adjustments to the scope’s windage and elevation to zero the rifle.
Maintenance and Troubleshooting
Regular Inspections
- Inspect Screws: Regularly check the screws to ensure they remain tight.
- Check for Movement: Ensure the scope hasn’t shifted in the rings.
Addressing Common Issues
- Scope Movement: If the scope shifts, recheck the tightness of all screws and ensure the rings and base are properly aligned.
- Inconsistent Accuracy: Verify the scope is level and check for loose components.
Advanced Techniques for Enhanced Stability
Using Bedding Compound
Bedding compound can be used to create a custom-fit interface between the rings and the scope tube, enhancing stability.
- Apply Bedding Compound: Apply a small amount of bedding compound to the inside of the rings.
- Mount the Scope: Place the scope in the rings and tighten the screws lightly.
- Allow to Cure: Let the bedding compound cure according to the manufacturer’s instructions before fully tightening the screws.
Lapping the Rings
Lapping the rings can help ensure a better fit and more even pressure on the scope tube.
- Use a Lapping Kit: Follow the instructions provided with the lapping kit to lap the rings.
- Check Fit: Ensure the rings provide even contact with the scope tube.
Alternative Methods for Tightening Scope Rings
While a torque wrench is the ideal tool for tightening scope rings to a specific torque, other methods can be employed to achieve a secure fit.
Using a Torque Driver
- Precision Control: A torque driver offers more precise control than a standard screwdriver.
- Setting Torque: Adjust the torque driver to the manufacturer’s recommended settings and tighten the screws.
Hand-Tightening Technique
- Consistent Pressure: Apply consistent, firm pressure to tighten the screws snugly without over-tightening.
- Feel for Resistance: Tighten until you feel firm resistance, then stop to avoid damaging the screws or scope.
Importance of Proper Eye Relief
Proper eye relief is crucial for comfort and safety. Eye relief refers to the distance from the scope’s eyepiece to your eye where you can see the full field of view.
Adjusting Eye Relief
- Initial Positioning: Place the scope roughly in position and check the sight picture.
- Fine-Tuning: Move the scope forward or backward until you achieve a clear, full sight picture.
Testing Eye Relief
- Shoulder the Rifle: Shoulder the rifle as you would when shooting.
- Check Sight Picture: Ensure you can see the full field of view without any blackouts or tunnel vision.
Understanding Reticle Types
Different scopes come with various reticle types, each suited for different shooting applications.
Duplex Reticle
- Versatility: The duplex reticle is one of the most common and versatile reticles, featuring thick outer lines that taper to thinner inner lines.
- Applications: Suitable for hunting and general shooting.
Mil-Dot Reticle
- Range Estimation: The mil-dot reticle is useful for range estimation and holdover adjustments.
- Applications: Popular among long-range shooters and military applications.
BDC Reticle
- Bullet Drop Compensation: The BDC reticle features markings that correspond to specific distances, allowing for quick holdover adjustments.
- Applications: Ideal for hunting and tactical shooting where quick range adjustments are necessary.
Scope Mounting
Mounting a scope without a torque wrench requires attention to detail and a methodical approach. By understanding the components, selecting the right tools, and following a systematic process, you can achieve a secure and accurate scope mount. Regular maintenance and periodic checks will ensure your scope remains properly mounted, providing consistent performance and accuracy.
This guide covers the essential steps and advanced techniques for mounting a scope without a torque wrench, ensuring you can achieve a secure and reliable setup. If you need to add more information or specific details, please let me know.
Precision Adjustments for Accuracy
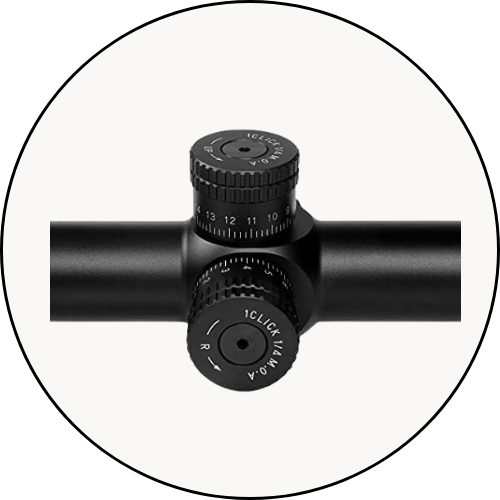
Once the scope is securely mounted, making precise adjustments is crucial for achieving optimal accuracy. This process involves fine-tuning the windage and elevation settings on your scope.
Windage Adjustments
Windage refers to the left and right adjustments on the scope, which compensate for horizontal deviations.
- Initial Zeroing: Use a bore sighter to get a rough alignment of the scope. Then, fire a few test shots at a target to see where the bullets impact.
- Making Adjustments: If the bullets are hitting to the left of the target, adjust the windage turret to the right and vice versa. Make small adjustments and recheck the impact point after each change.
Elevation Adjustments
Elevation adjustments correct for vertical deviations, allowing you to compensate for bullet drop over distance.
- Initial Zeroing: Similar to windage, use a bore sighter and test shots to determine the initial impact point.
- Adjusting for Bullet Drop: If the bullets are hitting below the target, adjust the elevation turret up and vice versa. Small adjustments should be made, followed by test shots to verify the changes.
Understanding MOA and Mil Adjustments
Scopes are typically adjusted in MOA (Minutes of Angle) or Mils (Milliradians). Understanding these units is crucial for making precise adjustments.
Minutes of Angle (MOA)
- Definition: One MOA is approximately 1 inch at 100 yards. This unit is commonly used in hunting and general shooting.
- Adjustment Increments: Scopes with MOA adjustments usually click in 1/4 MOA increments, meaning each click moves the point of impact by 1/4 inch at 100 yards.
Milliradians (Mil)
- Definition: One Mil is 3.6 inches at 100 yards. This unit is often used in tactical and long-range shooting.
- Adjustment Increments: Mil scopes typically adjust in 0.1 Mil increments, moving the point of impact by 0.36 inches at 100 yards per click.
Advanced Techniques for Mounting Without a Torque Wrench
When a torque wrench is not available, there are several advanced techniques to ensure your scope rings are tightened correctly.
Hand-Tightening Techniques
- Feel for Consistency: Tighten the screws until you feel a consistent resistance. This method relies on your sense of touch to gauge the tightness.
- Avoid Over-Tightening: Be cautious not to apply too much force, which can strip the screws or damage the scope.
Using a Coin or Key
In the absence of proper tools, a coin or key can serve as a makeshift screwdriver for tightening scope ring screws.
- Flat Surface: Use the flat edge of a coin or the rounded end of a key to turn the screws.
- Firm Grip: Ensure you have a firm grip on the coin or key to apply consistent pressure without slipping.
Importance of Scope Mounting Position
The position of the scope on your rifle can significantly affect your shooting experience and accuracy.
Forward and Backward Positioning
- Optimal Eye Relief: Position the scope so that you have a full, clear view through the scope with a comfortable cheek weld.
- Recoil Consideration: Ensure the scope is not too close to your eye to prevent scope bite from recoil.
Height Positioning
- Proper Alignment: The height of the scope should allow for a natural alignment with your eye when you shoulder the rifle.
- Clearance: Ensure there is sufficient clearance between the scope and the rifle barrel to avoid contact and potential damage.
Scope Leveling Techniques
Proper leveling of the scope is crucial for maintaining accuracy, especially at long distances.
Using Multiple Levels
- Bubble Levels: Place a bubble level on the receiver and another on the top turret of the scope.
- Alignment Check: Adjust the scope until both levels indicate that the scope is perfectly horizontal.
Digital Levels
For increased precision, digital levels can be used to ensure the scope is perfectly leveled.
- Digital Accuracy: Digital levels provide a precise reading, often to a fraction of a degree.
- Multiple Readings: Take multiple readings along different parts of the scope to ensure overall level alignment.
Scope Ring Selection and Compatibility
Choosing the right scope rings is critical for ensuring a secure fit and maintaining accuracy.
Matching Ring Size to Scope Tube
- Scope Tube Diameter: Ensure the rings match the diameter of the scope tube (common sizes are 1 inch and 30 mm).
- Height Considerations: Select rings of appropriate height to accommodate the scope’s objective lens and provide a comfortable shooting position.
Material and Durability
- Aluminum Rings: Lightweight and corrosion-resistant, suitable for most hunting and shooting applications.
- Steel Rings: Heavier but more durable, preferred for tactical and long-range shooting where stability is paramount.
Impact of Environmental Conditions
Environmental factors can affect the performance and stability of your scope mounting system.
Temperature Changes
- Expansion and Contraction: Extreme temperatures can cause metal components to expand or contract, potentially loosening screws.
- Regular Checks: Periodically check the tightness of the screws if you’re shooting in varying temperatures.
Humidity and Moisture
- Corrosion Prevention: Moisture can lead to corrosion of metal components, weakening the mount.
- Protective Coatings: Use scope rings and bases with protective coatings to resist corrosion.
Long-Term Maintenance and Care
Maintaining your scope and mounting system ensures ongoing performance and accuracy.
Regular Inspections
- Check for Wear: Regularly inspect the scope rings, base, and screws for signs of wear or damage.
- Retighten Screws: Periodically check and retighten screws as necessary to maintain a secure mount.
Cleaning and Lubrication
- Clean Components: Keep the scope, rings, and base clean to prevent dirt and debris from affecting performance.
- Lubricate Screws: Apply a small amount of lubricant to the screws to prevent rust and ensure smooth operation.
Professional Assistance
If you’re unsure about mounting your scope or encounter issues you can’t resolve, seeking professional assistance can be beneficial.
Gunsmith Services
- Expert Installation: A professional gunsmith can ensure your scope is mounted correctly and securely.
- Troubleshooting: Gunsmiths can diagnose and fix issues related to scope mounting, alignment, and performance.
Shooting Instructors
- Personalized Guidance: Shooting instructors can provide personalized advice and techniques for scope mounting and alignment.
- Skill Improvement: Instructors can help improve your shooting skills and ensure your scope setup enhances your performance.
Mounting a scope without a torque wrench requires attention to detail, the right tools, and a methodical approach. By understanding the components, selecting appropriate tools, and following a systematic process, you can achieve a secure and accurate scope mount. Regular maintenance and periodic checks will ensure your scope remains properly mounted, providing consistent performance and accuracy. Remember, a well-mounted scope can significantly enhance your shooting experience and accuracy, making the effort to mount it correctly well worth the investment.
Precision Tools and Techniques for Scope Mounting
Achieving a secure and precise mount for your scope without a torque wrench involves using alternative tools and techniques that ensure consistency and accuracy.
Using a Wheeler FAT Wrench
The Wheeler FAT (Firearm Accurizing Torque) Wrench is a popular tool among shooters for precise screw tightening.
- Adjustable Torque: The Wheeler FAT Wrench allows you to set specific torque values, ensuring consistent screw tightness.
- Versatility: This tool can be used for various firearm maintenance tasks, making it a valuable addition to your toolkit.
Manual Screwdrivers
While a torque wrench provides precise measurements, manual screwdrivers can be used effectively with the right approach.
- Consistent Grip: Use a screwdriver with a comfortable grip to apply even pressure.
- Incremental Tightening: Tighten screws incrementally, alternating between screws to maintain even pressure and alignment.
Thread Locker Application
Thread locker can prevent screws from loosening due to recoil and vibration. Proper application is key to its effectiveness.
Choosing the Right Thread Locker
- Medium Strength: Use a medium-strength thread locker, such as Loctite Blue 242, which provides secure holding power while allowing for future adjustments.
- Avoid Permanent Thread Lockers: Avoid high-strength (permanent) thread lockers like Loctite Red 271, as they make disassembly difficult.
Applying Thread Locker
- Clean Screws and Threads: Ensure screws and threads are clean and free of oil or debris before applying thread locker.
- Small Amount: Apply a small drop of thread locker to the screw threads. Avoid excessive application, which can make future adjustments difficult.
- Allow to Cure: After tightening the screws, allow the thread locker to cure according to the manufacturer’s instructions before using the firearm.
Scope Alignment Tools
Proper alignment of the scope with the rifle is crucial for accuracy. Several tools can aid in achieving perfect alignment.
Reticle Leveling System
A reticle leveling system ensures the reticle is perfectly horizontal, preventing canting issues.
- Mounting the Level: Attach the leveling device to the scope or rifle, following the manufacturer’s instructions.
- Adjusting the Reticle: Adjust the scope until the reticle is level, as indicated by the leveling system.
Bubble Levels
Bubble levels are simple and effective tools for leveling the scope.
- Two-Level System: Use one bubble level on the receiver and another on the top turret of the scope.
- Fine-Tuning: Adjust the scope until both bubble levels indicate a level position.
Advanced Reticle Adjustments
Different types of reticles offer various benefits and require specific adjustment techniques.
First Focal Plane (FFP) vs. Second Focal Plane (SFP) Reticles
Understanding the differences between FFP and SFP reticles helps in making accurate adjustments.
- First Focal Plane (FFP): The reticle size changes with magnification, maintaining consistent subtensions at all magnification levels. Ideal for long-range shooting where holdovers are used.
- Second Focal Plane (SFP): The reticle size remains constant, and subtensions are accurate only at a specific magnification. Common in hunting scopes.
Zero Stop and Return to Zero Features
Advanced scopes may have zero stop and return to zero features, which simplify adjustments and enhance accuracy.
- Zero Stop: A mechanical feature that prevents the elevation turret from being dialed below a preset zero point. Useful for quick return to zero after making elevation adjustments.
- Return to Zero: Ensures the scope returns to the original zero setting after adjustments. This feature enhances repeatability and confidence in your zero.
Environmental Factors Affecting Scope Performance
Environmental conditions can impact scope performance and mounting stability. Understanding and mitigating these factors can enhance accuracy.
Temperature Variations
Extreme temperatures can affect the metal components of the scope and mount.
- Thermal Expansion and Contraction: Metal components expand in heat and contract in cold, potentially loosening screws. Periodically check screw tightness if shooting in varying temperatures.
- Material Choice: Consider using scope rings and bases made from materials with low thermal expansion properties.
Humidity and Moisture
Moisture can cause rust and corrosion, affecting the integrity of the mounting system.
- Corrosion-Resistant Materials: Use scope rings and bases made from corrosion-resistant materials, such as stainless steel or anodized aluminum.
- Protective Coatings: Apply protective coatings to metal components to prevent rust and corrosion.
Troubleshooting Common Mounting Issues
Identifying and resolving mounting issues can ensure a secure and accurate setup.
Scope Shift or Movement
Scope movement can affect accuracy and consistency.
- Check Screw Tightness: Ensure all screws are tight and properly torqued.
- Inspect Rings and Base: Look for defects or damage that could cause movement. Replace any damaged components.
Misalignment
Misalignment can lead to inconsistent accuracy and difficulty zeroing the scope.
- Re-Level the Scope: Use a bubble level or reticle leveling system to re-level the scope.
- Check Ring Alignment: Ensure the rings are properly aligned and evenly spaced on the base.
Difficulty Adjusting Windage and Elevation
If adjustments are difficult or unresponsive, there may be an issue with the scope or mounting system.
- Inspect the Scope: Ensure the scope is not damaged and that the turrets move freely.
- Check for Obstructions: Ensure there are no obstructions or debris affecting the adjustments.
Enhancing Accuracy with Parallax Adjustment
Parallax adjustment helps ensure the reticle remains on target at various distances.
Understanding Parallax
Parallax occurs when the reticle appears to move against the target when you move your head. Proper parallax adjustment ensures the reticle remains fixed on the target.
- Side Focus Parallax Adjustment: Common in high-end scopes, allows for quick adjustments without changing your shooting position.
- Adjustable Objective (AO): Found on some scopes, involves rotating the front objective lens to eliminate parallax at specific distances.
Making Parallax Adjustments
- Set Distance: Identify the distance to your target.
- Adjust Parallax: Adjust the parallax knob or objective until the reticle remains fixed on the target when you move your head.
Maintaining Scope Integrity Over Time
Regular maintenance and care ensure your scope remains accurate and reliable.
Cleaning the Scope
- Lens Cleaning: Use a lens cleaning solution and a microfiber cloth to clean the lenses. Avoid using rough materials that could scratch the lenses.
- Body Cleaning: Wipe down the scope body with a soft cloth to remove dirt and debris.
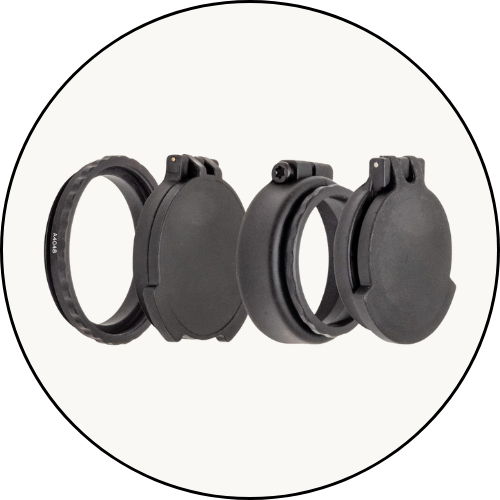
Protecting the Scope
- Scope Covers: Use scope covers to protect the lenses from dust and scratches when not in use.
- Storage: Store the rifle in a dry, cool place to prevent moisture damage.
Scope Mounting Best Practices
Following best practices for scope mounting ensures a secure and reliable setup.
Proper Ring Spacing
- Even Spacing: Ensure the rings are evenly spaced on the base for balanced support.
- Avoid Overlapping: Avoid overlapping the rings onto the scope’s turrets or objective bell.
Consistent Tightening
- Alternating Pattern: Tighten screws in an alternating pattern to apply even pressure.
- Incremental Tightening: Tighten screws incrementally to ensure consistent pressure without over-tightening.
Properly mounting a scope without a torque wrench requires attention to detail, the right tools, and a systematic approach. By understanding the components, using appropriate techniques, and maintaining regular inspections, you can achieve a secure and accurate scope mount. This guide covers essential steps and advanced techniques for mounting a scope without a torque wrench, ensuring you can achieve a reliable setup for enhanced shooting performance. If you need more information or specific details, please let me know.
Scope Mounting and Balancing for Various Firearm Types
Different firearms have unique mounting requirements and challenges. Understanding these differences can help ensure a secure and accurate scope mount.
Bolt-Action Rifles
Bolt-action rifles are popular for their accuracy and simplicity. Proper scope mounting is crucial for maintaining these characteristics.
- Mounting Position: Ensure the scope is mounted far enough forward to avoid interference with the bolt handle.
- Eye Relief: Adjust the scope for proper eye relief, considering the rifle’s recoil.
Semi-Automatic Rifles
Semi-automatic rifles, such as the AR-15, have unique challenges due to their design and recoil dynamics.
- Recoil Management: Use high-quality, robust scope rings and bases to handle the increased recoil forces.
- Optic Height: Ensure the scope is mounted at the correct height for a comfortable cheek weld and proper sight picture.
Lever-Action Rifles
Lever-action rifles often have limited space for mounting a scope, requiring careful selection of mounting components.
- Compact Scopes: Choose a compact scope that fits within the limited space available on the receiver.
- Mounting Systems: Use specialized mounts designed for lever-action rifles to ensure a secure fit.
Customizing Your Scope Mount
Customizing your scope mount can improve comfort and accuracy. Several accessories and techniques can enhance your setup.
Cantilever Mounts
Cantilever mounts extend the scope forward, providing additional eye relief and space for accessories.
- Extended Eye Relief: Ideal for rifles with limited rail space or for shooters who prefer a more extended eye relief.
- Accessory Mounting: Provides additional rail space for mounting accessories like red dot sights or laser rangefinders.
Adjustable Scope Rings
Adjustable scope rings allow for fine-tuning the height and alignment of the scope.
- Height Adjustment: Customize the height of the scope to match your shooting style and comfort.
- Windage and Elevation Adjustment: Some rings offer windage and elevation adjustment to assist with initial zeroing.
Optimizing Scope Performance
To get the most out of your mounted scope, optimize its performance through proper use and settings.
Magnification Settings
Understanding and utilizing the scope’s magnification settings can enhance your shooting experience.
- Variable Magnification: Adjust the magnification based on the shooting distance and target size. Higher magnification is useful for long-range shooting, while lower magnification provides a wider field of view for close-range targets.
- Fixed Magnification: Fixed magnification scopes offer simplicity and reliability. Choose a magnification level that suits your primary shooting application.
Illuminated Reticles
Illuminated reticles can improve visibility in low-light conditions.
- Brightness Adjustment: Adjust the reticle brightness to match the ambient lighting conditions, avoiding excessive brightness that could obscure the target.
- Battery Management: Keep spare batteries on hand and regularly check the battery life to ensure the reticle remains illuminated when needed.
Advanced Mounting Techniques
For shooters seeking the highest level of precision, advanced mounting techniques can provide additional stability and accuracy.
Pillar Bedding
Pillar bedding involves installing metal pillars in the rifle stock to provide a stable foundation for the action and scope mount.
- Increased Stability: Pillar bedding reduces stock compression and provides a more consistent mounting surface.
- Professional Installation: Consider having pillar bedding installed by a professional gunsmith for optimal results.
Glass Bedding
Glass bedding uses epoxy resin to create a custom-fit interface between the rifle’s action and the stock.
- Custom Fit: Glass bedding creates a perfectly matched surface, reducing movement and increasing stability.
- Enhanced Accuracy: By eliminating movement and providing a consistent mounting surface, glass bedding can improve the rifle’s overall accuracy.
Managing Recoil and Impact Forces
Recoil and impact forces can affect the stability of the scope mount. Understanding how to manage these forces can enhance your setup.
Recoil Pads and Buffers
Recoil pads and buffers can reduce felt recoil and protect the scope from excessive impact forces.
- Recoil Pads: Install a recoil pad on the rifle’s buttstock to absorb some of the recoil energy.
- Buffers: Use recoil buffers designed for specific firearms, such as semi-automatic rifles, to reduce impact forces on the scope mount.
Recoil Lug
A recoil lug is a metal piece that fits between the rifle’s action and the stock, helping to distribute recoil forces.
- Enhanced Stability: The recoil lug helps prevent the action and scope mount from shifting under recoil.
- Installation: Some rifles come with a built-in recoil lug, while others may require aftermarket installation by a gunsmith.
Long-Range Shooting Considerations
For long-range shooting, precise scope mounting and adjustment are critical for accuracy.
Ballistic Calculators
Ballistic calculators can help determine the necessary adjustments for windage and elevation based on distance, bullet type, and environmental conditions.
- Data Input: Input the specific data for your rifle, ammunition, and shooting conditions.
- Adjustment Recommendations: Use the calculator’s recommendations to adjust the scope’s turrets for accurate long-range shots.
Range Finders
Range finders provide accurate distance measurements to the target, aiding in precise scope adjustments.
- Laser Range Finders: Use a laser range finder to quickly and accurately measure the distance to the target.
- Integrated Systems: Some scopes come with integrated range finders, providing real-time distance data directly in the reticle.
Regular Training and Practice
Consistent training and practice are essential for maintaining and improving your shooting skills and scope mounting proficiency.
Dry Fire Practice
Dry fire practice involves practicing your shooting technique without live ammunition.
- Technique Improvement: Focus on improving your trigger control, breathing, and sight picture.
- Scope Alignment: Use dry fire practice to ensure your scope remains properly aligned and mounted.
Live Fire Drills
Regular live fire drills help maintain and enhance your shooting accuracy and scope adjustments.
- Zeroing Practice: Periodically re-zero your scope to account for any changes in the mounting system or environmental conditions.
- Dynamic Shooting: Practice shooting from various positions and distances to ensure your scope setup performs well in different scenarios.
Scope Mounting for Specialized Shooting Disciplines
Different shooting disciplines may require specific scope mounting techniques and considerations.
Hunting
Hunting often involves variable distances and challenging environments.
- Durability: Use robust and weather-resistant mounting components to handle harsh outdoor conditions.
- Quick Adjustments: Ensure your scope allows for quick windage and elevation adjustments to respond to changing distances.
Tactical and Defensive Shooting
Tactical and defensive shooting prioritize speed, reliability, and accuracy.
- Quick-Release Mounts: Consider using quick-release mounts for fast scope changes and backup iron sights.
- Low-Light Performance: Use scopes with illuminated reticles and large objective lenses for better low-light performance.
Competitive Shooting
Competitive shooting demands the highest levels of accuracy and consistency.
- Precision Mounting: Use advanced mounting techniques, such as pillar and glass bedding, to maximize stability and accuracy.
- Custom Adjustments: Tailor your scope adjustments and settings to match the specific requirements of your competitive shooting discipline.
Properly mounting a scope without a torque wrench requires attention to detail, the right tools, and a systematic approach. By understanding the components, using appropriate techniques, and maintaining regular inspections, you can achieve a secure and accurate scope mount. This guide covers essential steps and advanced techniques for mounting a scope without a torque wrench, ensuring you can achieve a reliable setup for enhanced shooting performance. If you need more information or specific details, please let me know.
Final Thoughts
Mounting a scope without a torque wrench requires patience, attention to detail, and the right tools. By following the methods and techniques outlined in this guide, you can achieve a secure and accurate scope mount, enhancing your shooting experience and accuracy.
Remember, the key steps include:
- Proper Preparation: Ensure all components are clean, free of debris, and in good condition before mounting.
- Methodical Approach: Use alternative tools like a Wheeler FAT Wrench, manual screwdrivers, or improvised tools like coins or keys for tightening.
- Precision Adjustment: Fine-tune windage and elevation settings carefully, using MOA or Mil adjustments based on your scope’s specifications.
- Advanced Techniques: Consider options like pillar bedding, glass bedding, or using cantilever mounts for customized setups.
- Regular Maintenance: Keep your scope clean, inspect screws periodically, and address any issues promptly to maintain optimal performance.
By mastering these techniques and maintaining regular care, your scope will provide consistent reliability and accuracy, whether you’re hunting, competing, or enjoying recreational shooting activities. If you have any further questions or need additional assistance, feel free to ask. Happy shooting!


Leave a Reply